Install Mirantis Container Platform on AWS
This article aims to help you install and test the Mirantis Container Platform composed of MKE, MCR and MSR.

This article aims to help you install and test the Mirantis Container Platform which is composed of:
Mirantis logo
As a reminder, this solution is based on the former Docker EE (Enterprise Edition) solution that Mirantis acquired in 2019. This container platform is also the only one able to manage both Swarm and Kubernetes container orchestration.
Swarm is not already dead and remains relevant for simple use cases
Even if Kubernetes become the de facto standard for enterprise container orchestration, Swarm is not already dead and remains relevant for simple use cases. We can still find some good feedback on it like this one.
Create infrastructure for the lab
The Mirantis solution is agnostic, you can install it on any infrastructure. For this lab we will provision resources on AWS with Terraform.

Follow this guide to provision lab resources on AWS
Requirements
Here is some requirement to use the provided Infrastructure as Code project :
- Terraform installed
- AWS account with credentials
- AWS Keypair existing with the corresponding private key on your local machine
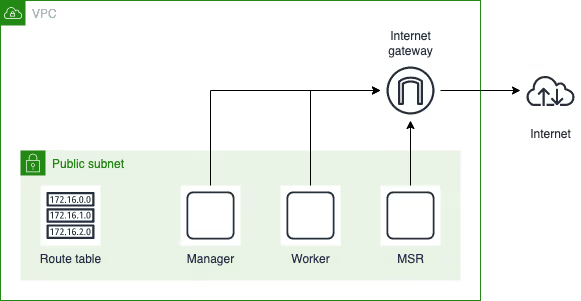
Architecture
With the default configuration, the project creates the infrastructure for a cluster with one node per role: manager, worker, msr.
Install Mirantis Container platform
Now that the infrastructure is provisioned, we can start the installation of Mirantis components using the Launchpad CLI.
First, have a look at the Mirantis official documentation to understand the overall process.
The launchpad.yaml file should exist in the root directory of the project. Terraform generated it during the provisioning phase based on the given configuration. So, check the content of the file to see what’s in it and make sure it matches your environment. Otherwise, go back to the provisioning guide to adapt the configuration and update infrastructure.
Then install Mirantis components
Copy both URL provided at the end of the installation process, we need them to access MKE and MSR.
Take a tour
Installation of the Mirantis components ends successfully. It’s time to access the different web interfaces and take a tour !
Mirantis Kubernetes Engine (MKE)
Access the MKE web console using the credentials present in yourlaunchpad.yaml file. If you have a license you can configure it at this step, otherwise select the Skip for now option.
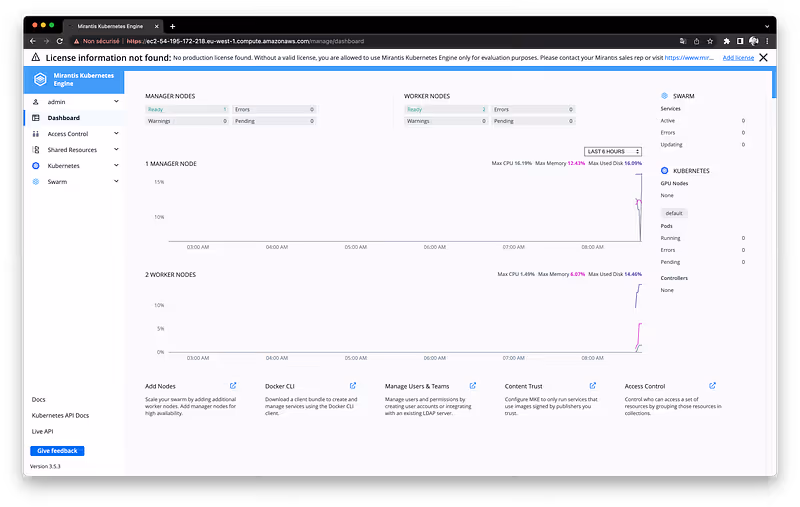
MKE Dashboard
Check the list of cluster nodes going in Shared resources > Nodes
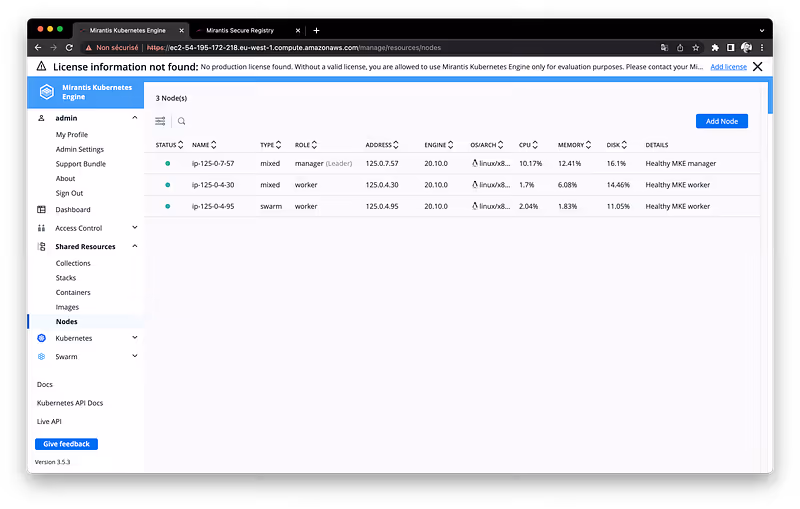
Cluster nodes list
- Nodes are shared resources because they are used both for Swarm and Kubernetes orchestration.
- The column
typeindicates the type of orchestration supported on the node. Manager nodes are always ofMixedtype. But we can choose betweenSwarm,KubernetesorMixedfor worker nodes. - MSR nodes are worker node, but they hold some labels that avoid other application deployment than the container registry.
Mirantis Secure Registry (MSR)
Always in the MKE interface, check that the MSR registry is well integrated with the cluster in Admin Settings > Mirantis Secure Registry
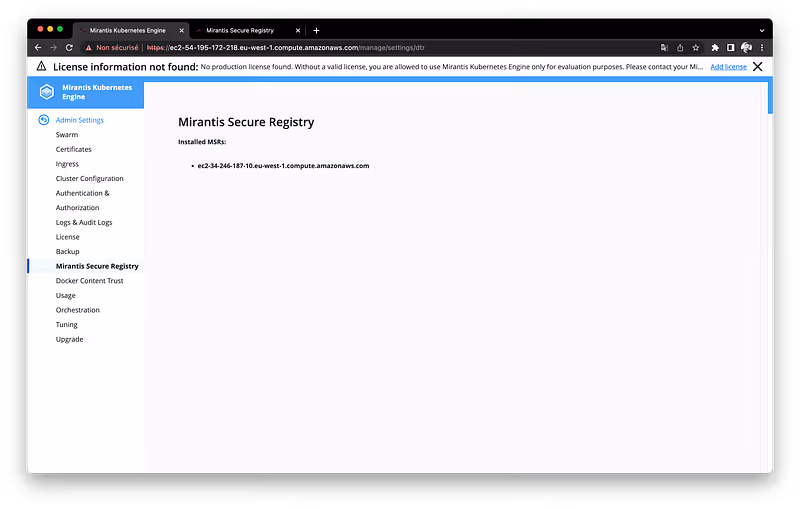
Registry configured
Have a look at the dedicated MSR interface using the second URL provided at the end of the installation process.
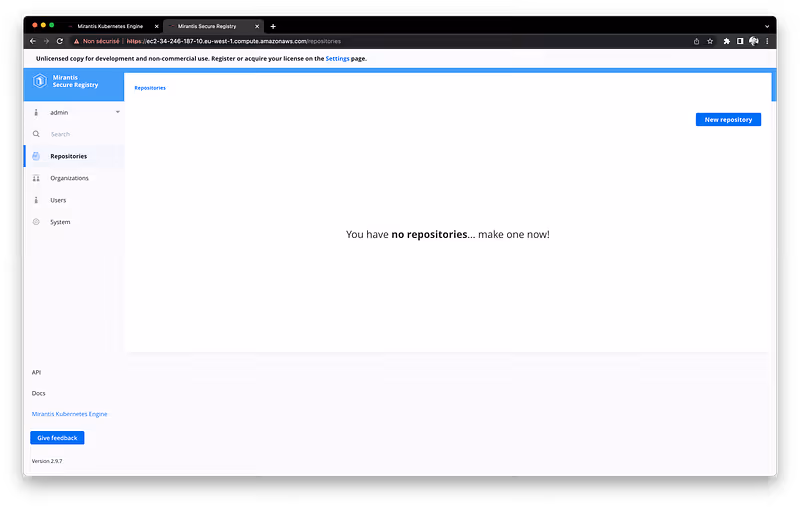
MSR dashboard
Conclusion
This article and the associated Github project helps to:
- Install a MKE cluster on AWS using Terraform.
- Discover the Mirantis Container Platform solution which is agnostic and supports both Swarm and Kubernetes orchestration.
I encourage you to browse the official documentation of MKE and MSR to discover all the features offered by these solutions.
Initialement publié sur Medium.